


How To Build Raised Decking
How to Build Decking on a Slope
 Fay
Fay December 19, 2022
-
How to
How To Build Decking On Uneven Ground & A Slope
As we know, gardens come in all shapes and sizes. Many homeowners have a sloped garden and struggle to utilise it. You can enhance your exterior space and add value to your property by building composite decking on your sloped or uneven landscape. We have created a simple step-by-step guide for building decking on a slope if you choose to complete this project yourself. When customers are considering building decking in their sloped garden, they often have multiple questions regarding the process.
We have conveniently compiled some frequently asked questions that customers have asked over time in order to ease the process for you. We will look at significant aspects of your project, such as designs you can utilise when you have a sloped landscape, the foundation needed, cost and planning permission.
FAQs from customers
Can sloping decking be built directly on the ground?
In order to build a decking on a sloped surface, you will need to utilise materials such as posts or pedestals in order to create a level decking surface. In order to build a decking on a sloping garden, you will need either posts or pedestals to level the area.
Posts can be utilised to level the decking by digging holes into the ground and cementing them to ensure stability. Alternatively, you can use pedestals to level the ground. Pedestal extenders can be added to the pedestals in order to create more height for a larger slope. They are adjustable and can be adapted to various different heights to suit your individual garden space. On the other hand, you can completely level your garden before installing your decking by digging it up and using a spirit level to ensure an even surface.
What foundation does my slope need to be built upon?
You can build upon multiple various ground surfaces, whether it is concrete or soil. Building on concrete is much more stable than soft ground and will provide your decking with extra structural integrity, as there is no chance it will shift over time as the soil will. Concrete is preferred, as other foundations will weaken over time, leading to breakages and, ultimately, the collapse of the decking, which is both unsafe and expensive.
Does the ground have to be level?
Your landscape does not have to be completely level in order to install decking in your garden. There are various methods, as mentioned above, e.g., posts and pedestals, which can be utilised in order to create a level decking that will enhance your landscape. Therefore, the ground does not have to be level in order to install composite decking or wooden decking, as there are ways to create a level deck to use in your outdoor garden.
Will the gradient of my slope affect the cost?
Yes, if your sloped landscape is steep and therefore requires extra structural planning and materials, then this will cost more than ground-level decking. If your slope is slight, this should not drastically affect your cost.
Creating a completely concrete foundation will increase the cost of your project. However, it will create a structurally sound foundation, saving you money over time that would be spent on maintenance or repair. If you are utilising a composite substructure, this will also increase the cost but will ensure your project lasts a lot longer, saving you money over time.
Should I hire a professional?
Due to the complicated nature of steep sloping decking, we recommend hiring a professional to accurately complete the installation. This will ensure your project is completed correctly the first time, providing you with safety and peace of mind. As you will need balustrades to ensure maximum safety on any sloped decking with a drop on the edge of it, this should be fitted by a professional to provide maximum structural safety. We recommend that when looking for a fitter, you check their previous work and any reviews to be certain that you are receiving the best possible service and a structurally sound finished project.
Ways to build on a sloping garden?
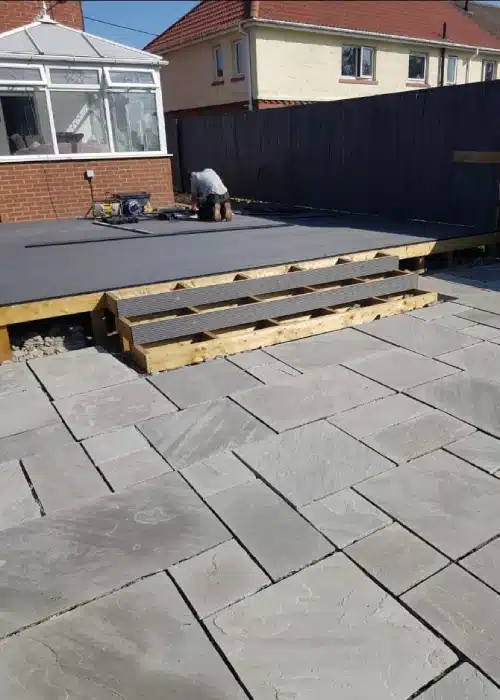
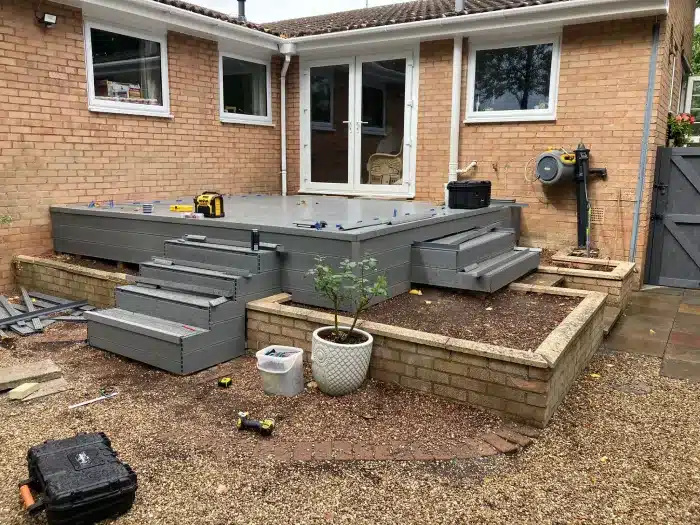
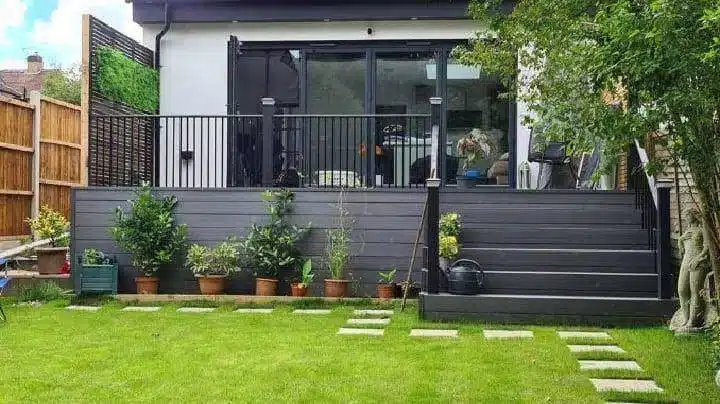
Although you may see having a sloped garden as restrictive, there are multiple ways you can utilise a sloped landscape to enhance your space. One feature you could use is multi-level decking. Many customers choose to install a staggered step-like structure to level off the area, retaining the dimension of their gardens whilst making the space more accessible. Additionally, you can choose to build steps into your decking project to make your sloped garden not only more practical but more aesthetically pleasing. Consumers often use steps as a feature on their sloped garden, utilising many various designs such as curved, L shaped, adding balustrades or varying widths.
Should the slope be away from the house?
When creating your decking surface, you must ensure a slight slope at a gradient of 2.5% to allow for surface runoff to avoid any water from pooling on your decking. Standing water on your composite boards and even wooden boards can create watermarking and stains, which will not only distort the appearance of your decking finish but can also affect the structural integrity of your decking boards. Despite being water resistant, composite material is not waterproof. Therefore, it should be kept dry when possible. When creating this gradient, it should be directed away from your house to allow the water to run away from the property, which stops any foundation issues from occurring. The boards should also be placed vertically from your property to ensure the water runs along the grain of the board to stop any damage to the board’s appearance.
What is the maximum gradient I can build decking on?
Any gradient above a 20% incline is considered steep. You can utilise posts or steps to create a level surface on a steep gradient in your garden. Therefore, there is no maximum slope gradient on which you can build. However, the higher the slope, the more stability is needed from the structure holding the decking.
Can you anchor your posts to the ground?
You can either choose to sink the posts into the ground with concrete and gravel, or you can anchor the posts with post base plates that are screwed into the ground. The anchoring method can only be used on concrete. There are also adjustable anchors for attaching posts to an unlevelled concrete surface.
These ensure you can adapt the height of your posts to suit the individual gradient of your garden slope. There are also heavy-duty posts available for greater stability. However, in most cases, you will need to sink your posts by digging the surface and using a concrete mix to set the post in place, a spirit level to ensure it is accurately vertical, and gravel to stabilise the posts in place. For additional support, you can screw batons at an angle into the post.
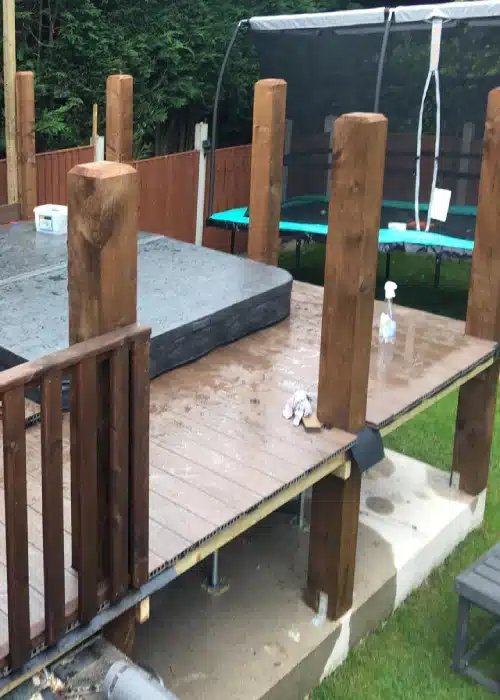
Can you utilise the space under the raised section of your decking?
Yes, many customers choose to fill the space under their decking when it is raised with posts or pedestals for extra space. You can use this space for tools or garden equipment, to create more space in your garden. This is a huge benefit of having a sloped landscape which requires a raised decking.
Should there be a gap between my house and the decking?
Yes, there needs to be a gap between your house and the decking to allow for any thermal expansion the decking will experience. If your decking is flush against your house, it will crack and warp the boards. This will lead to necessary replacement or repair, which will be costly and time-consuming. The gap should be a minimum of 25mm.
Do you need planning permission?
If you are installing decking in your sloped garden, you may wonder if you need planning permission. This is dependent upon the height and size of your decking project. If your decking is more than 30cm above ground level or covers more than 50% of your garden area, you will need to get planning permission. If you are unsure whether you need planning permission, you will need to check with your local planning authority.
Step-by-step guide
Materials needed
Decking boards, Posts, Concrete mix, Gravel, Joist, Joist hangers, Screws, Step stringers, Starter clips & decking clips.
Planning
Firstly, you will need to plan your project accurately in order to avoid any costly and time-consuming mistakes. You will need to decide on the location you want your decking, taking into consideration factors that will affect the maintenance of your projects, such as under trees, bushes or shade.
When planning the dimensions of your decking, ensure you factor in the necessary expansion gaps, allowing at least 6 mm for thermal expansion. You will also need to measure the height of your slope to accurately plan for any stairs or steps. Once you have worked out the dimensions of the decking area, you can calculate the number of boards you will need for your project. This will vary depending on the width of the boards. Therefore, if you are unsure, you can ask your supplier.
It is also recommended to get extra boards to allow for any mistakes or damaged boards. As a rule of thumb, 5% is usually a safe bet. This will ensure you are not wasting time; in case you make a mistake and have to wait for extra boards in order to complete your project.
Prepare the area
Secondly, you will need to clear the area you plan to build on of any grass, foliage or debris. You will need to dig at least 50mm deep across the entire surface of your landscape.
Once the area is clear of debris, it can be helpful to use strings and pegs to mark it. This works as a guide when building your substructure.
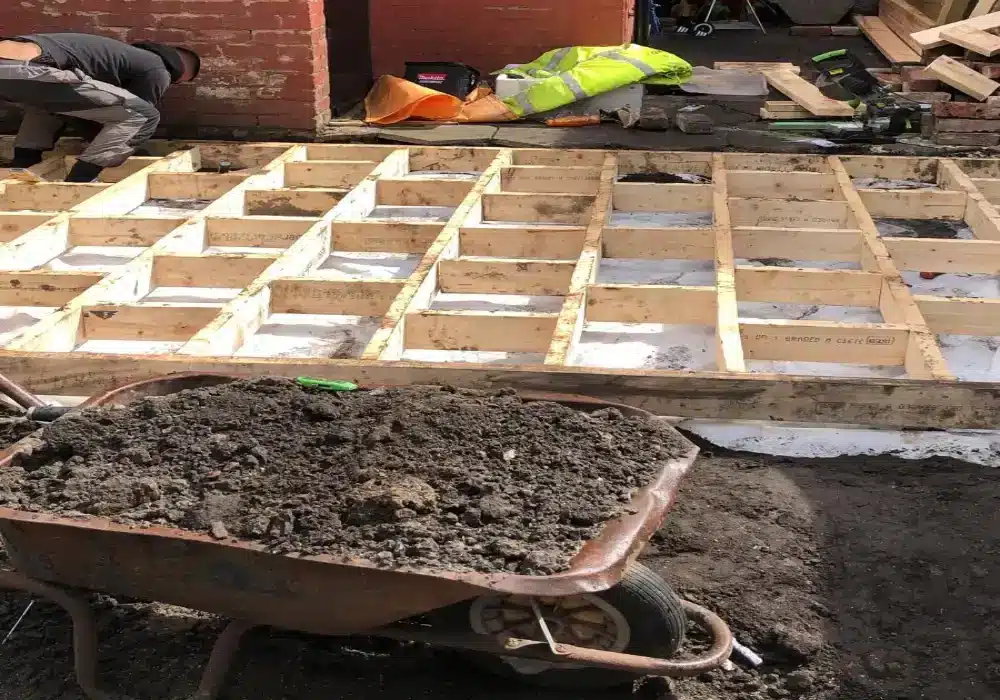
Posts
Once you have dug the surface, you will need to mark out where you are wanting the posts to be placed in your project and dig the holes that the posts will sit in. Your posts should be in a grid-like formation, with an equal distance between each post of 1.5m. Use around an inch of gravel at the bottom of the holes to allow drainage. Put your corner posts in the holes, using a level to make sure they are vertical, setting them in place with a concrete mix, and allowing this to dry per the instructions. You will need to sink a quarter of the post into the ground. Additionally, you can screw batons at an angle into the post for extra structural support.
Alternatively, if you already have an even concrete surface to build upon, you can choose to anchor your posts. Usually, with a sloped landscape sinking the posts is the preferred method, as it ensures maximum structural stability. When anchoring posts, you will need a support base to drill concrete fixing bolts into. Tightening the posts in place with a ratchet and spanner, tightening the bottom two bolts first, ensuring that the post sits upright. Remembering that whichever method you choose, you are creating a slight gradient of around 2.5%, allowing for surface runoff.
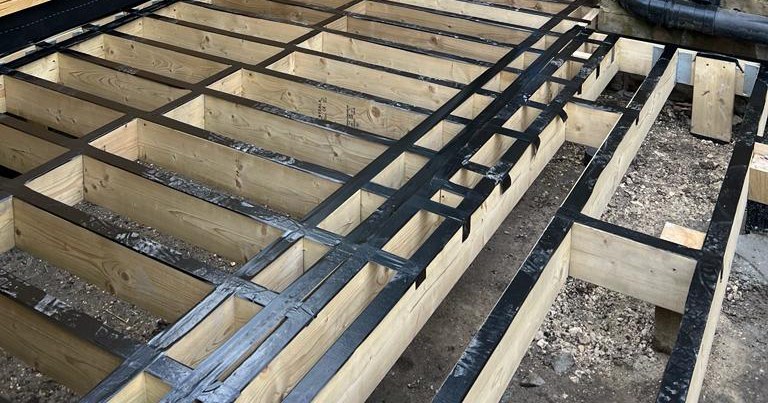
The frame
Once your corner posts are fitted and set, you will need to put the rest of your centre posts in, which will support the frame of your decking. It is recommended to start building the frame at the highest point of the decking.
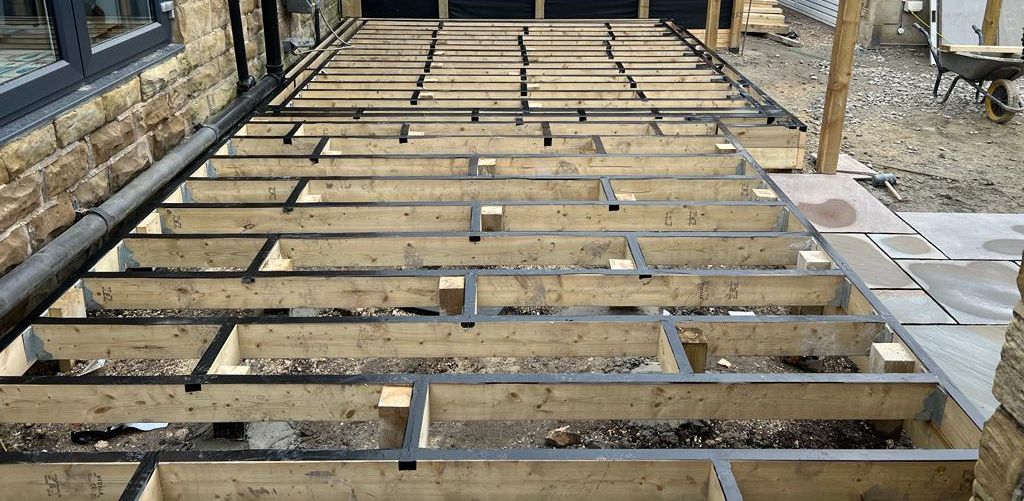
Joists
Now, you will be able to start adding the joists to your substructure. The joists are connected with joist hangers, with a 300mm joist centre. This supports your decking, providing structural integrity for the decking boards. Fix the metal joist hanger to one side of your first joist, using a screwdriver to screw into the wood. Galvanised structural screws are recommend.
Once secure, you can then hang it to the frame. If you are using a composite joist, you must allow a 10mm gap between each joist to allow for thermal expansion.
Building steps
You will need to build the steps prior to laying your decking boards. This is necessary to secure the step stringers to the exterior frame. You can utilise joist hangers to attach the step stringers to the decking.
First, pre-drill your stringers at a 45-degree angle into your subframe. The stringers will now be in place, so you can insert joist hangers underneath the stringers. Drill through the joist hangers to attach the stringers to the frame.
Attach the decking boards to the stringers. If you have solid boards, you can screw straight through them. Alternatively, if you have hollow decking boards, you must use hidden fasteners when attaching them to the stringers. This is because drilling through hollow composites will damage its structural integrity. If you are using a bullnose board for your steps, you will have to use starter clips to do so.
You will need to add a fascia in order to hide the stringers on the sides and front of your steps. You can screw these in, even if the decking boards are hollow, as they will not be stood on and therefore do not need to withstand high amounts of pressure.
Lay your decking boards
Once you have completed your steps, you can begin to lay your composite boards on the entirety of your decking. Ensuring to allow for thermal expansion with a gap of at least 3mm. Use starter clips when first laying your composite boards onto the decking frame, then switching to hidden fasteners. Once all the boards are laid down, you can utilise composite trims or a fascia to hide the edges and make your decking more visually appealing.
Once all the above steps are completed accurately, you have successfully installed your composite decking on a sloped landscape. You can now begin to enjoy your enhanced outdoor space, in any season and climate. If you are unsure about any part of the installation process, you can contact your composite decking supplier.
Alternatively, as mentioned above, we do recommend hiring a professional to complete the project for you, to be sure no mistakes are made that could detrimentally alter the structural integrity of the decking.
- Share:
-

-
-

Next Article
Composite Planters